Welcome back!
Ready to check out?
You're just one click away from fantastic style and even better savings!
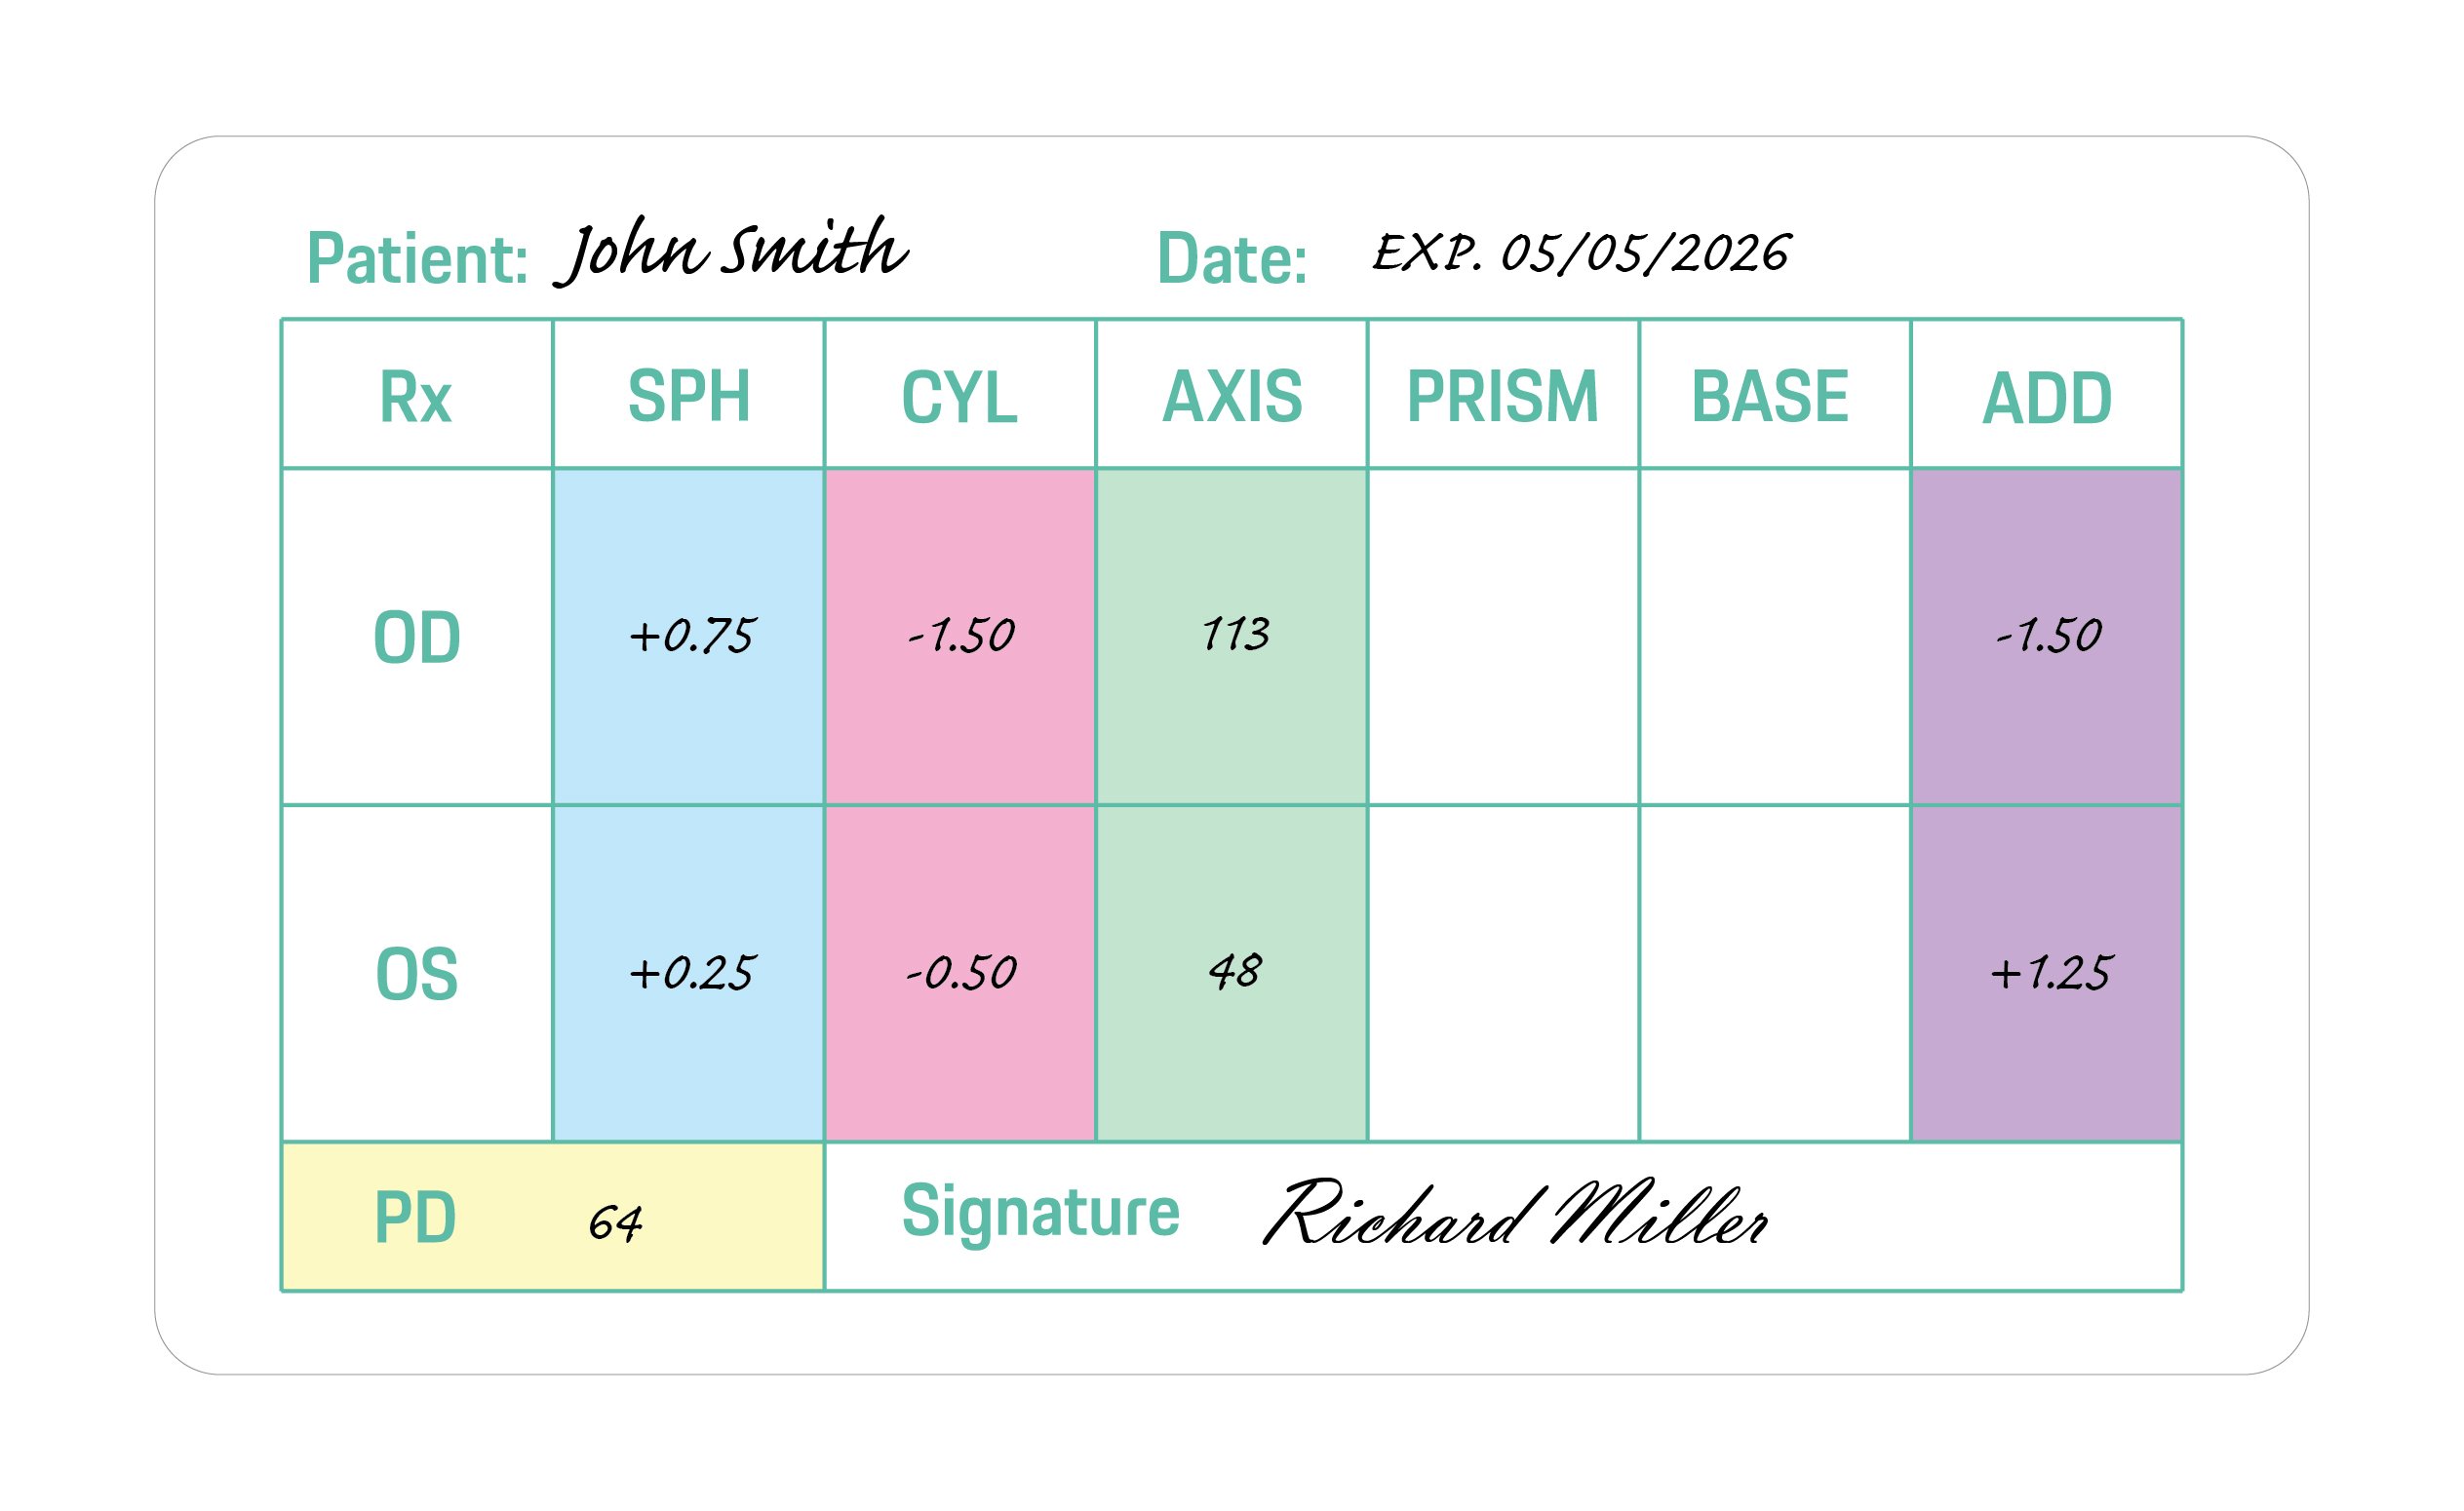
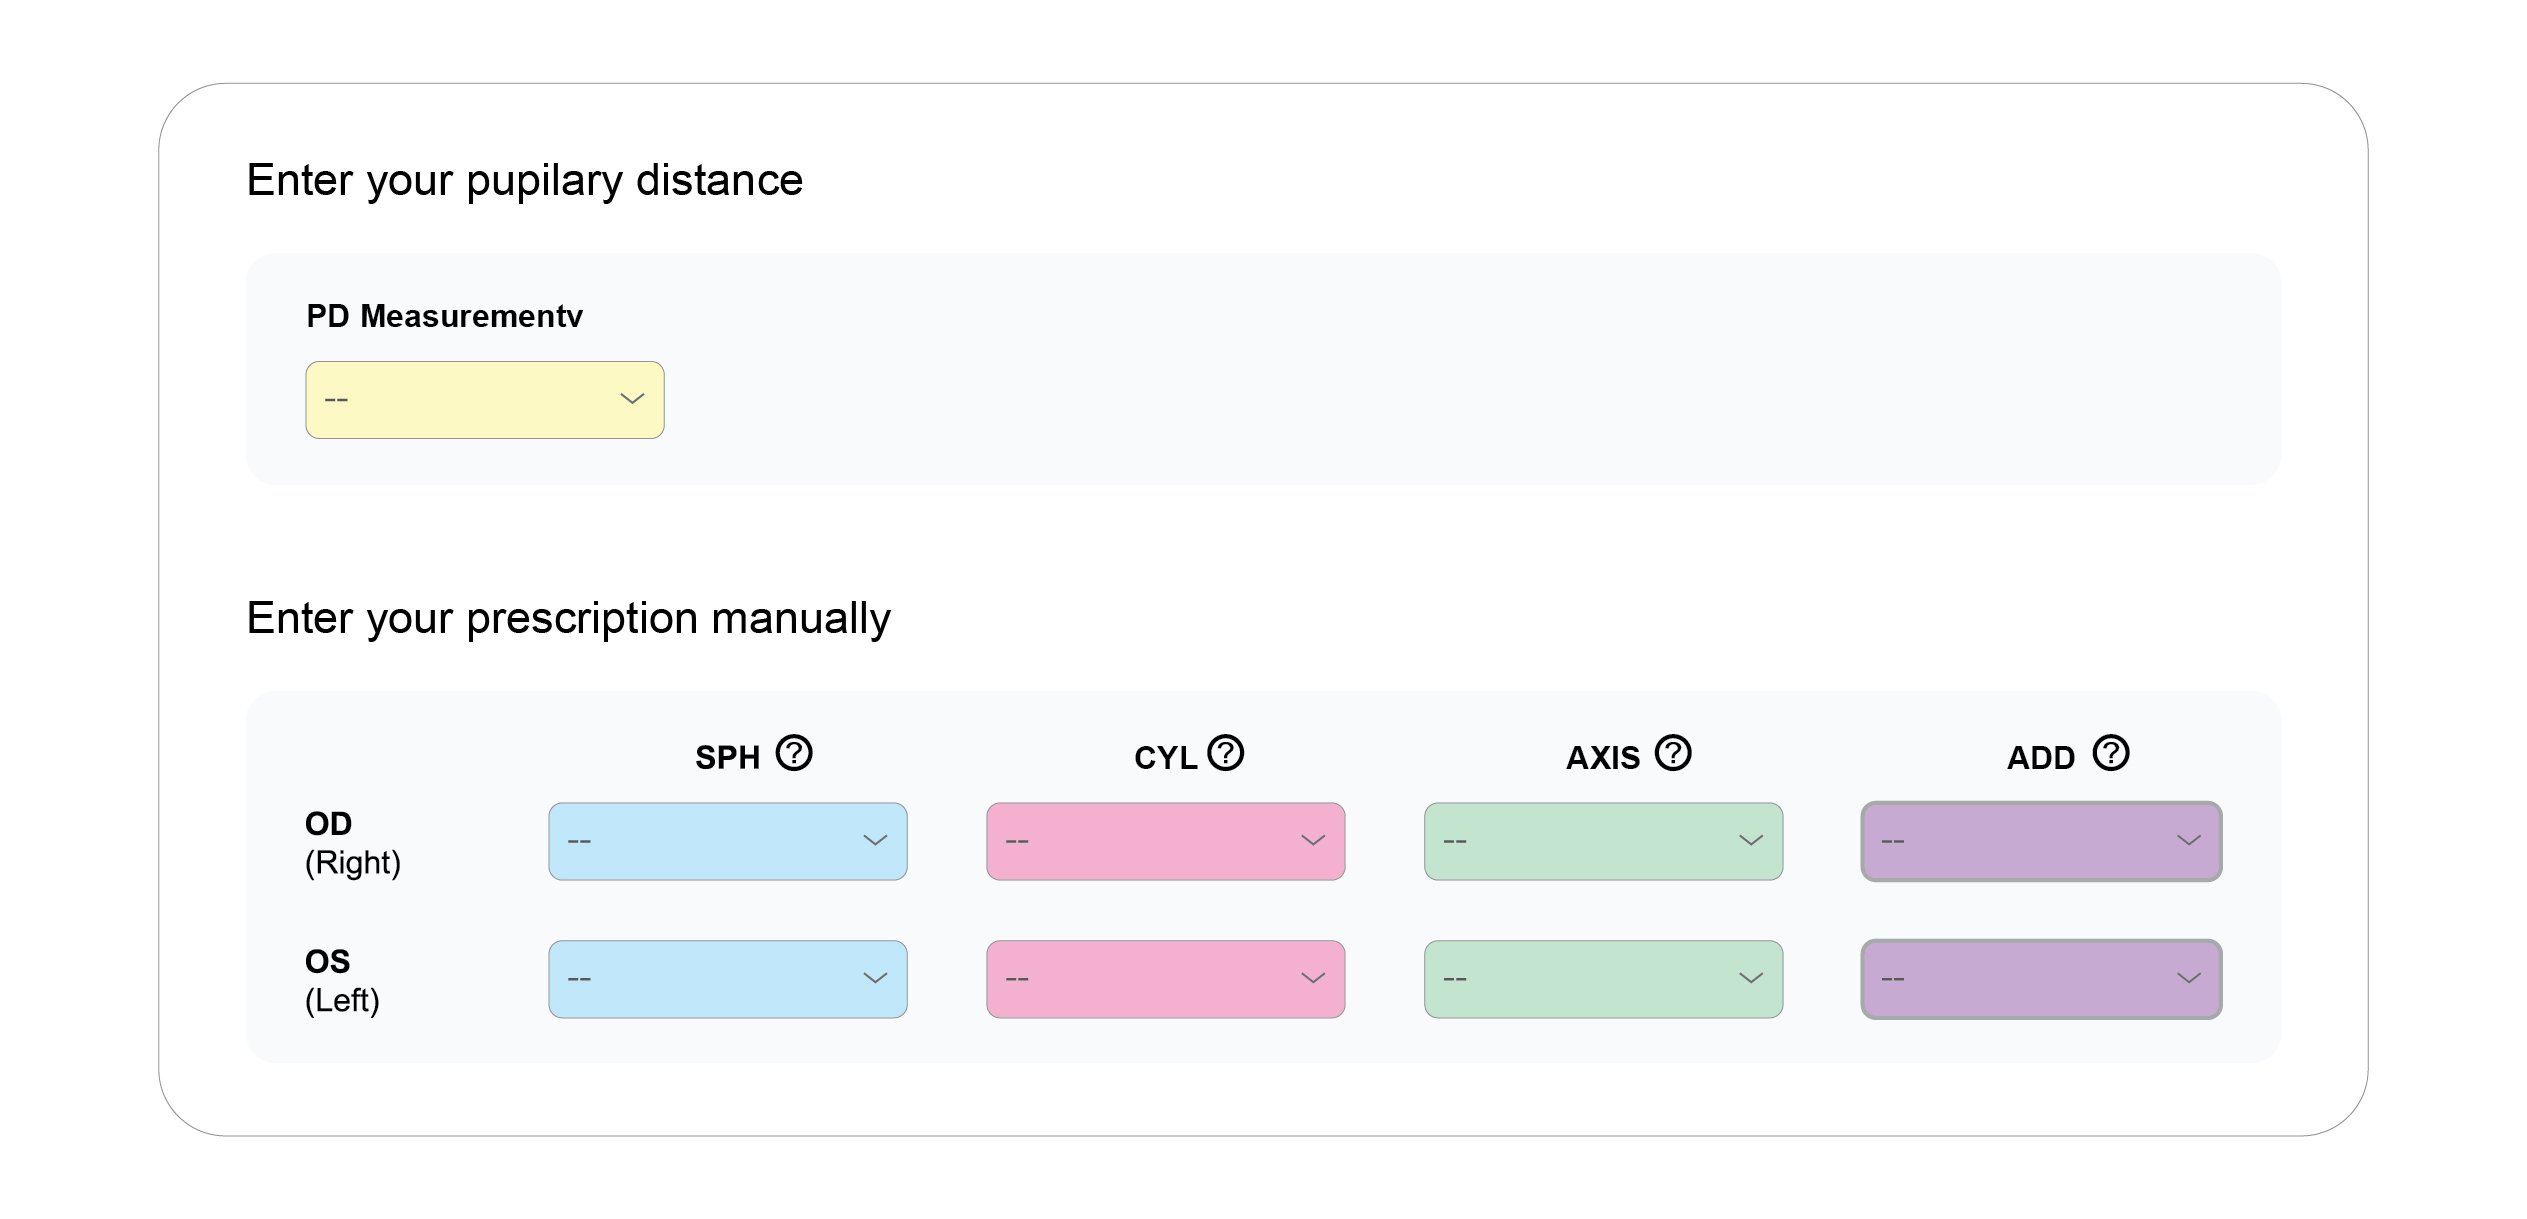
OD is an abbreviation for the Latin term oculus dexter which means right eye. Notice that the right eye information is asked for first even though we typically read from left to right.
OS is an abbreviation of the Latin oculus sinister which means left eye. That will be referenced on the far right column of the prescription.
SPH is short for sphere. The sphere of your prescription indicates the power on the lenses that is needed to see clearly. A plus (+) symbol indicates the eyeglass wearer is farsighted. A minus (-) symbol indicates that the eyeglass wearer is nearsighted.
CYL is short for cylinder. The cylinder indicates the lens power necessary to correct astigmatism. If the column has no value (is blank), it indicates that the eyeglass wearer does not have astigmatism. If this is the case on your prescription, you can leave it blank when entering it in.
AXIS is a prescription will include an axis value for those with astigmatism. This number represents the angle of the lens that shouldn't feature a cylinder power to help correct your astigmatism.
ADD is short for "additional correction." This is where details about bifocals, multifocal lenses or progressive lenses would appear.
The Retro Diffusion extension acts as a highly capable assistant rather than a replacement for human creativity. It excels at breaking through creative blocks, rapidly prototyping concepts, and automating tedious tasks like texturing large background tiles. By handling the initial heavy lifting, it frees you up to focus on what matters most: refining animations, polishing fine details, and building your game.
Increase the resolution of your pixel art while maintaining crisp edges.
Once you have purchased and downloaded the Retro Diffusion files, follow these steps to install it into Aseprite. Step 1: Install the Extension File Open . retro diffusion extension for aseprite download
Runs generations on external servers. Ideal for users with lower-end hardware or laptops without dedicated graphics cards.
Retro Diffusion runs on your computer using your hardware (GPU/CPU) or via an API. You need to link it to a generative AI backend. The Retro Diffusion extension acts as a highly
In the Retro Diffusion panel, select your target resolution (
Input a prompt like cobblestone path, mossy brick, top-down RPG . Increase the resolution of your pixel art while
This public link is valid for 7 days and shares a thread, including any personal information you added. This link or copies made by others cannot be deleted. If you share with third parties, their policies apply. Can’t copy the link right now. Try again later.
The extension can run on your CPU or AMD cards, but generation times will be significantly slower. Step-by-Step Installation Guide
Modern noise plugins often look "digital." The algorithms in this extension simulate optical light diffusion. When you download the Retro Diffusion extension, you aren't just adding static; you are adding texture physics that mimic how light scatters in old camera lenses.
Download the .aseprite-extension file bundled with your purchase. Step 2: Install via Aseprite Launch .
*Discount applied on the current website price at the time of order. Offer only valid for new customer first contacts order over $10. Maximum discount of $100. Cannot be combined with any other offers. Promotions are subject to change without notice. We reserve the right to cancel orders that are in breach of the terms and conditions of this offer.


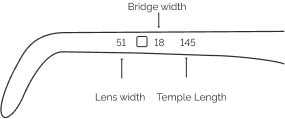
| Lens Width | Bridge Width | Temple Length | |
|---|---|---|---|
| XS | < 42 mm | < 16 mm | <=128 mm |
| S | 42 mm - 48 mm | 16 mm - 17 mm | 128 mm - 134 mm |
| M | 49 mm - 52 mm | 18 mm - 19 mm | 135 mm - 141 mm |
| L | >52 mm | >19 mm | >= 141 mm |
Buying eyewear should leave you happy and good-looking. Use our sizing tool to find frames that best fit your unique facial measurements.
Grab a regular card with a magnetic stripe on the back. Student IDs, credit cards and gift cards work well to start our online PD tool.
You may have received our paper PD measurement tool in your recent online order. In order to use this tool, place the ruler on your eyes so that the "0" lines up at the centre in between your eyes. Add up the two numbers, to get your PD. See example below:
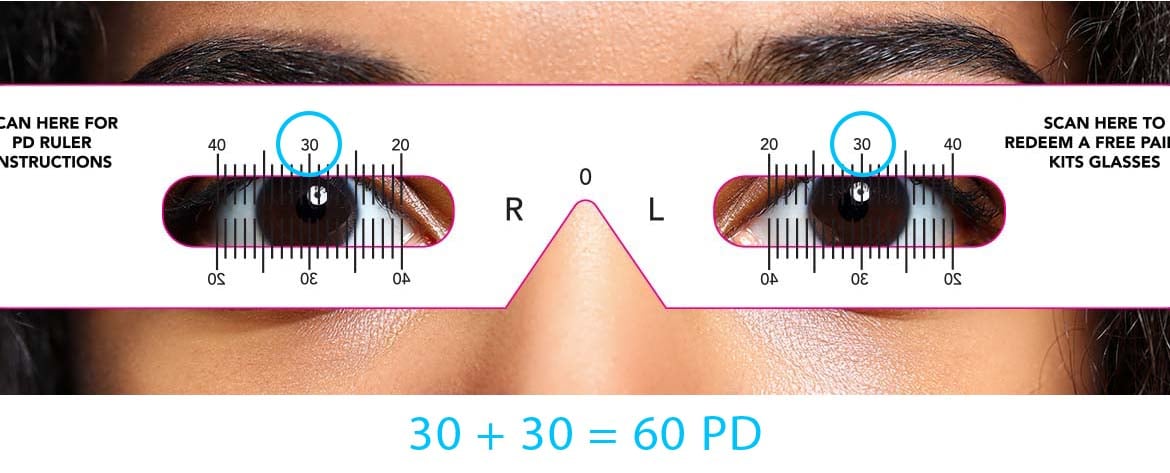
Click on this link to download and print your own PD measurement tool.
DOWNLOAD